
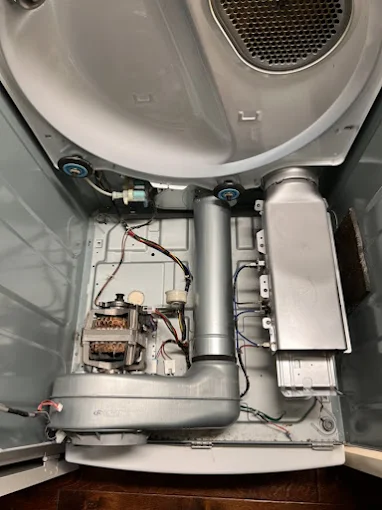
Lint Escape Prevention: Dryer Duct Cleaning Pro Tips (Frisco, TX)
If you’ve ever opened a dryer to find that “fresh” laundry smell… but also noticed a faint musty odor or saw lint collecting in places it shouldn’t, you’re not imagining things. In Frisco homes and small businesses, we often see the same chain reaction: a partially restricted dryer duct, a poor connection at the wall or transition, and lint that eventually finds a way to escape into the laundry room or even the surrounding structure.
At Lone Star Pro Flow LLC in Frisco, TX, dryer duct cleaning isn’t just about improving airflow. It’s about stopping lint escape before it becomes a recurring maintenance headache, an indoor air quality issue, or—worst case—a safety problem. Below are the pro-level observations and practical steps we use to prevent lint from working its way out.
Quick Answer
Lint escapes from dryers most often due to restricted airflow, loose or damaged duct connections, crushed/rigid duct runs, and missing or worn transitions (including improper vent termination). A proper dryer duct cleaning service includes inspection, safe disconnection/reconnection, duct cleaning through the full run, and verifying the vent path is sealed and functional so lint can’t leak back into the room.
How Lint Escapes (And What You Can Actually Do About It)
Let’s talk about what we typically find when we inspect dryer exhaust systems around Frisco and the surrounding communities. The pattern is surprisingly consistent:
1) The duct is “technically connected,” but not sealed
A lot of dryer vents are joined with the wrong materials or installed in a way that allows micro-gaps. Even small gaps can leak fine lint over time—especially when the system cycles on and off.
What it looks like:
- Lint around the dryer connection or at the wall transition
- Greasy-looking dust on nearby surfaces
- A dryer that takes longer to dry clothes than it used to
2) Airflow is restricted, so lint backs up and migrates
When airflow is restricted, lint doesn’t just “sit.” It moves. It can get pulled toward weak points in the duct joints, vent hood, or transition areas.
Most common restriction causes:
- Lint buildup along the duct length
- Ducts pushed too tightly into corners
- Crushed flexible duct sections
- Long runs with too many turns
3) The vent termination is underperforming
A vent hood that doesn’t open freely, is installed incorrectly, or sits too close to a wall surface can trap moisture and lint. Over time, that combination encourages build-up and increases the chance of lint escape.
What we often see:
- Hood flaps stuck or weak
- Incorrect termination height or placement
- Duct ending without a proper transition to the exterior
What Most Customers Get Wrong About Dryer Duct Cleaning
This is where I’ll be a little opinionated: many people approach dryer vent maintenance like it’s a one-time chore. In reality, dryer exhaust systems are dynamic—they change performance as lint accumulates, joints loosen, and duct runs age.
Here are the mistakes we see most:
Mistake A: “I cleaned the lint trap, so I’m fine.”
Lint trap cleaning helps—but it only captures lint before it enters the duct. Fine lint still travels into the exhaust path. The duct is where lint escape becomes likely.
Mistake B: Using “brush kits” without fixing the airflow path
DIY brush kits can help with surface lint in short runs. But if the duct has crushed sections, poor connections, or long turns, brushing alone often doesn’t remove the packed material deep in the run.
Mistake C: Overlooking the connection points
Customers usually inspect the duct length, but lint leakage commonly happens at:
- Dryer-to-duct connections
- Duct-to-wall transitions
- Exterior vent hood connections
A professional dryer duct cleaning approach treats these as critical inspection zones—not afterthoughts.
Mistake D: Assuming “flex duct” is always okay
Flexible duct can be fine when installed correctly, but it’s also the easiest way to end up with crushed sections that choke airflow. In Texas homes—especially where duct routing gets tight—this is a frequent culprit.
Our Take After Working With Local Customers in Frisco
Frisco is a “newer build” market in many areas, but not every home or business has a dryer vent system that was installed for long-term performance. We routinely run into:
- Laundry rooms retrofitted over time (new dryer, moved locations, changes in duct routing)
- Multiple prior “fixes”—someone resealed one joint, then added a short extension, then replaced a hood
- Busy households and property managers who want quick results and don’t always notice slow changes in dryer performance until it’s inconvenient
One real-world scenario we see: a family notices drying times creeping up over a few months. They switch cycles, try different settings, and replace the lint screen more often. Then they finally see lint collecting around the wall vent area. When we inspect, the issue isn’t just lint—it’s an airflow restriction plus a connection leak that let lint migrate back.
That’s why we don’t treat dryer exhaust cleaning as “just vacuuming.” The goal is to restore proper airflow and stop escape paths.
Dryer Duct Cleaning Pro Tips: A Practical Prevention Framework
Below is a step-by-step framework we use and recommend—whether you’re planning professional service or doing a short pre-check before a technician arrives.
Step-by-step: Lint Escape Prevention Checklist
1) Confirm the symptom pattern
- Are clothes taking longer to dry?
- Do you smell heat or mustiness in the laundry room?
- Do you see lint near the dryer or wall outlet?
- Is there visible lint on the exterior hood area?
2) Inspect the duct run for “pressure points”
Look for:
- Crushed or sharply bent sections
- Duct sagging or pulling away from joints
- Evidence of disconnected or reconnected sections
3) Check the exterior termination
- Does the hood flap open easily (when the dryer runs)?
- Is there lint buildup at the hood?
- Any signs of moisture staining around the exterior vent area?
4) Verify the connection integrity
This is a big one. Even if lint isn’t visible, connection gaps can leak fine particles. If you see dust at joint areas, assume leakage and plan for a proper service.
5) Have the full duct cleaned—not just the easy part
The “full run” matters. Lint accumulation can be heavier deeper in the duct where airflow slows and turns.
6) Re-test performance after service
A good dryer exhaust cleaning job isn’t finished when the visible lint is gone. The system should run more efficiently, and the duct path should behave like it’s supposed to.
What Professional Service Includes (and What to Ask Before You Hire)
If you’re comparing options for dryer vent cleaning services or looking for duct and dryer vent cleaning, here’s what separates a solid job from a quick pass.
What to look for in reputable dryer duct cleaning services
- Dryer vent inspection before cleaning (not after)
- Safe disconnection/reconnection at the dryer and wall transition
- Cleaning through the entire run (not only the first section)
- Attention to duct material condition (flexibility, crush points, damage)
- Verification of airflow and venting performance after cleaning
- Discussion of sealing and connection points to prevent re-escape
Quick comparison: DIY vs professional
| Approach | What it can fix well | Where it often falls short |
|---|---|---|
| DIY lint removal | Surface lint near accessible areas | Packed lint deeper in the run, connection leaks, crushed sections |
| Professional dryer duct cleaning | Full-run cleaning + inspection + performance checks | Requires scheduling and access to the full system |
If you’re also trying to improve overall HVAC-related airflow in the home, you may want to understand how ductwork cleaning fits into the bigger picture. You can explore more through HVAC services and dryer duct cleaning for the specifics of dryer exhaust care.
AI Overview Answer: How Can I Stop Dryer Lint From Escaping?
Lint escape prevention comes down to two things: keeping airflow strong and eliminating leak paths.
1) Restore airflow by removing lint buildup throughout the duct run (not only the lint trap). Restricted airflow causes lint to back up and migrate toward joints and weak points.
2) Seal and secure connections at the dryer-to-duct and wall transition. Even small gaps can leak fine lint into the laundry room and around the vent opening.
3) Correct vent routing issues like crushed duct sections and excessive bends, which choke exhaust flow.
4) Confirm exterior termination performance so lint and moisture don’t accumulate around the vent hood.
A professional inspection is the fastest way to identify whether the primary problem is restriction, leakage, or termination performance.
FAQs: Dryer Vent Cleaning in Real Life
How do I know if I need professional dryer vent inspection?
If drying times are increasing, laundry feels warmer but still damp, you notice lint collecting around the dryer connection, or you see lint at the exterior vent hood, you likely need a dryer vent inspection. In many cases, the lint trap is doing its job but the duct system isn’t. A technician can check airflow behavior, duct condition, and connection integrity—things that are hard to confirm without inspection tools.
Why does the lint escape even after I clean the lint trap?
Because the lint trap only captures lint before it enters the exhaust duct. Fine particles still travel into the duct and vent hood. If the duct is restricted (buildup, crushed sections, turns) or if there’s a loose joint or unsealed transition, lint can migrate and escape into the laundry room.
What should I check before booking dryer vent cleaning services?
Ask whether they include inspection, full-run cleaning, and verification afterward. Also ask how they handle duct connections and damaged or crushed duct sections. If a service only focuses on the lint trap area or the first reachable section, it usually won’t address the root cause of lint escape.
How often should dryer exhaust cleaning happen in a home or business?
Frequency depends on usage, duct length, and whether the system is properly installed and maintained. For busy households and commercial settings, build-up can happen faster. A local service provider can recommend a schedule after inspecting the duct condition and performance.
Ready to Reduce Lint Escape and Improve Dryer Performance?
If your dryer is taking longer to dry or you’re seeing lint where it shouldn’t be, it’s a good time to get the duct system checked—not just the lint trap. Lone Star Pro Flow LLC can help with dryer duct cleaning in Frisco, TX, and surrounding areas, with an eye on the exact connection and airflow issues that cause lint to escape.
About the Company
Lone Star Pro Flow LLC is a local pro-flow and duct-focused team serving homeowners and businesses in the Frisco, TX area. We approach dryer exhaust cleaning like it should be done in the field: inspect first, clean the full path, pay attention to connections and duct condition, and verify performance so the problem doesn’t quietly come back. For customers who want dependable indoor comfort and fewer surprises in the laundry room, that’s the standard we work by.